Step by Step: The Film Insert Molding Process
January 30, 2023 • Posted in Events
Project planning takes “know how,” and sometimes it’s helpful to know how a production process works when designing your decorated plastic part. Details like when the decoration is applied, how silk screening works, what happens in the injection mold cavity — having at least a basic understanding of all of these processes can help with planning for designs, product refreshes and timelines.
Plus, we enjoy talking about them!
So if you have a project on the way and want to know more before enlisting the help of an in-mold labeling (IML) manufacturer, here is a step-by-step overview of the film insert molding process so you can follow along.
The Film Insert Molding Process
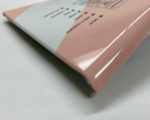
1. Printing
At Sanwa, we use a silk screen process for printing — similar to how a screen printed shirt is made. We have stencils with very small holes that allow ink to pass though. A design is “burned” into the screen using an emulsion, and each color or layer gets its own screen. The combination of screens creates the completed graphic design. This allows us to keep our quality high and ensure proper graphic registration.
Printing Patent: We have a patented solution for preventing rust or discoloration when using silver inks. Standar colors (like white, black, etc.) can be made from basic materials, but metallic colors like silver or gold have to have some metal inside. If the edge of a part has silver exposed, over time it could rust. At Sanwa, we have a patented process to prevent this.
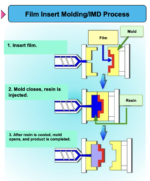
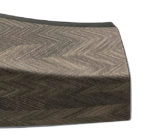
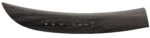
2. Forming
Next, we use “high pressure forming” in which heat and pressure are used to bend the printed film without cracking the printed ink or plastic.
Our patented forming method allows for superior quality and registration. With forming, there can be stretching, which could create off-center graphics. To address this, we have developed countermeasure methods to produce tolerance parts. The forming allows the printed film to form to the injection mold cavity shape. This small detail in the process allows for greater quality, the option for edges and corners to be wrapped without resin showing, and can prevent light from leaking out of the non-wrapped areas (like sides edges and corners).
Read more about making the most of high-quality molded parts with rounded corners and edges.
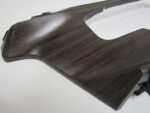
3. Injection Molding
Once the silk screen printed graphic has been formed, it is placed into the injection mold cavity — this is where the film injection molding process begins! Speed, pressure, and temperature are all important factors when producing a high quality molded part, and we have over 40 years of experience dialing in our processes to ensure the very best results.
Forming & Molding Patent: We also have a patented insert molding method in which no resin layer is seen and no wrinkle is generated by the film. This special thermoforming process allows us to deliver flawless three-dimensional parts for our customers consistently.
Want some inspiration? See the parts that we brought to the 2022 Auto Interior Expo in Detroit, MI.
What are the benefits of partnering with a one-stop-shop IML manufacturer like Sanwa? All of the above steps are completed in house, which means no one can play the blame game for missed timelines or defects. We take responsibility throughout the entire process. Read more about our services here.
And There’s Still More…
Of course, the above just covers the production process and doesn’t include the various other steps along the way when manufacturing molded plastic parts. At Sanwa, our larger process includes prototyping and evaluating, research, testing, and trials — all before we get to the mass production phase.
Learn more about what it takes to get your product created with this timeline.
We know many companies exist that make film insert molding and IML plastic parts. What sets us apart is our dedication to quality and feasibility. We invite you to stand out from the competition and be unique in your design and quality! And get in touch if you have other questions — responsiveness and education are at the heart of our philosophy, and we’re always happy to be a resource when it comes to creating high-quality decorative plastic parts.
“Our company has been doing business with Sanwa for the past 10 years and are very satisfied with their ability to meet our quality requirements as well as the delivery schedule on the products that we need to support WHP production. They have a very responsible and professional customer service team and are a pleasure to work with. The next project you have that requires IML capabilities please reach out to Sanwa for a quotation.” - Randy, Findlay, OH